Estatísticas Loja Online
Melhore as suas vendas analisando o comportamento dos seus clientes. Diferentes métricas irão ajudá-lo a melhorar as suas vendas pela Internet.
Extract information from an e-commerce service using an API with pagination restrictions to create a panel on Microsoft Power BI.
This guide is meant for orders in Jumpseller stores but can be used on any token-based API with pagination restrictions.
1. Copy API URL from your Admin Panel: Accounts section, use your own URLs, these are only for testing purposes and are now expired.
Paid Orders:
https://api.jumpseller.com/v1/orders/status/paid.json?login=XXX&authtoken=XXX
All Orders:
https://api.jumpseller.com/v1/orders.json?login=XXX&authtoken=XXX
2. Add pagination parameters to your URL, I picked all orders URL:
https://api.jumpseller.com/v1/orders.json?login=XXX&authtoken=XXX&page=3&limit=100
3. Paste the URL as a Web Query. This will only bring us 100 records, maximum per page. From this base query we will create a function and replace the page number with a parameter “page” so we can loop and get all pages of the store.
4. Left click on the Orders table and create a Function, edit the function adding the page as text argument, and replace the page number (3 on this example) with the parameter page.
5. Now we need to create a table that contains all of the paginated information, we will start with this function to generate a table with only one column for the pages (Only three pages on this example, this will return a maximum of 300 orders, you are free to add more):
	=
	Table.TransformColumnTypes(Table.FromRows({{1},{2},{3}},{"page"}),{{"page",type text}})
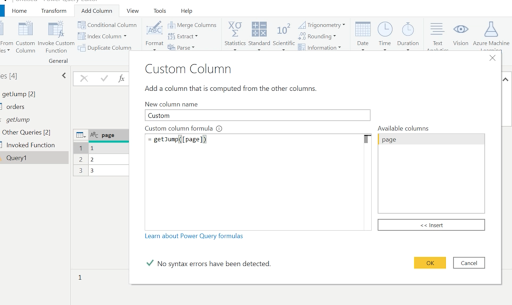
6. Go to Add Column and then Custom Column, apply the function to the page value, it will create a column with pages on its values, the final step is to expand.
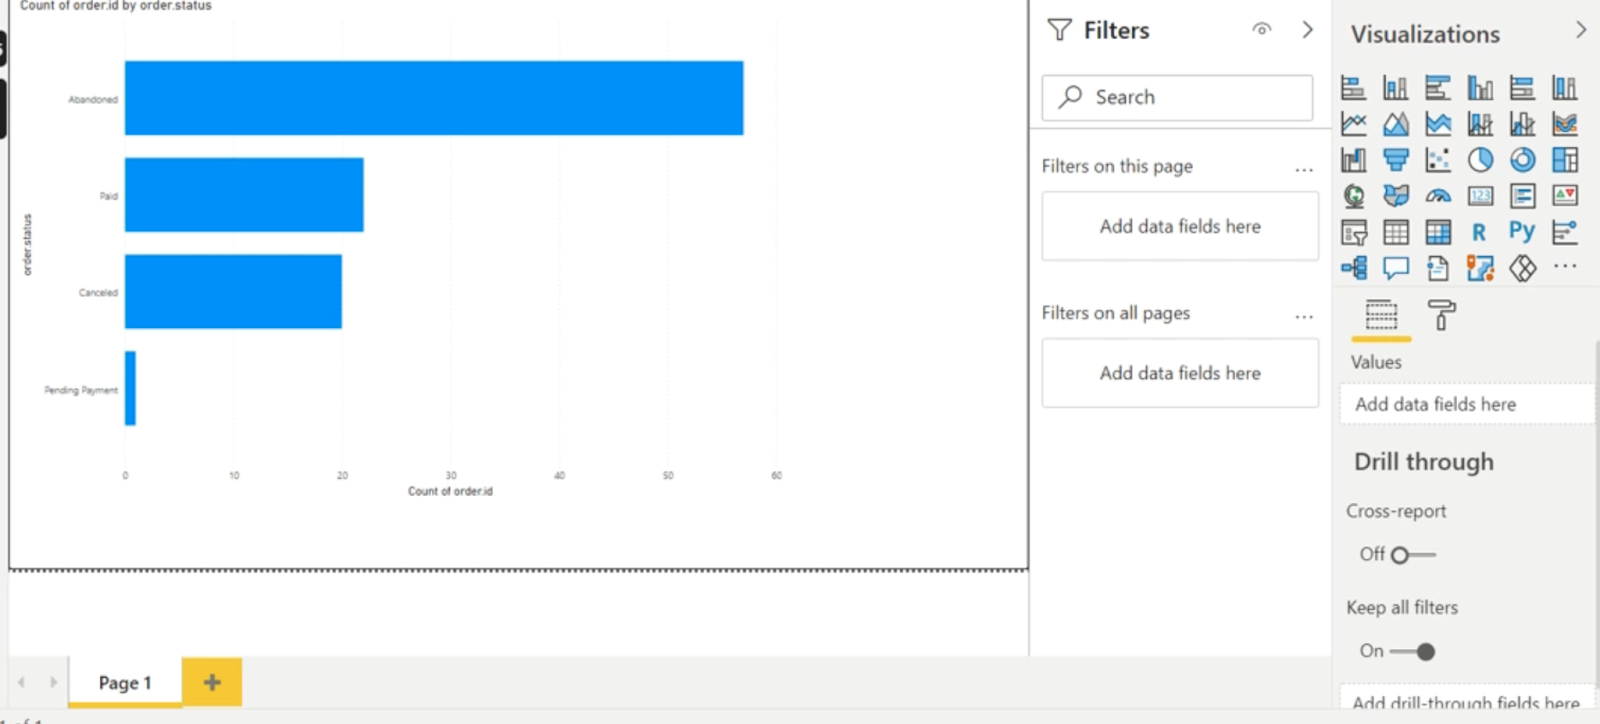
7. Create your dashboard.
Teste gratuito por 14 dias. Não é necessário cartão de crédito.